
Prerequisites
This document explains what you have to do before integrating Business Authentication APIs.
To use Business Authentication, a redirect URI must be registered. During the Business Authentication process, the authorization code requested by the service is delivered to the redirect URI. Refer to the redirect URI configuration location and method below.
- In [App] > [Platform key] > [REST API key] on the app management page > [Redirect URI]

A Client secret is a security feature that requires including a specific code issued by Kakao Developers in a request to obtain a Business token.
For service security, the REST API key (including the key automatically created with the app) is added with the Client secret feature enabled, and the related parameter must be included when issuing a token. Refer to the Client secret configuration location and method below.
- In [App] > [Platform key] > [REST API key] on the app management page > [Client secret]
You can enable business consent items in [Business Authentication] > [Consent Items] on the app management page.
Business consent items set for the app are reflected on the Business Authentication consent screen. For details and a full list of business consent items, see Business consent items.
For detailed configuration, see the descriptions for each item below.
Business consent items can only be set if you have permission to use additional features. For how to request permission, see Request additional features.
The requirements for setting business consent items can be found in How to use.
You can set business consent items required for retrieving service information or using features. The configured consent items are reflected on the Business consent screen.
See the step-by-step guide below.
Select [Set] for the desired consent item. Some consent items require Request additional features to be completed first before they can be configured. You can check the full list and details of each consent item below.


[A] Consent types
[B] Purpose of consent: Enter the usage purpose.
You can register the transfer personal information overseas in in [Business Authentication] > [Transfer of Personal Information Overseas] on the app management page.
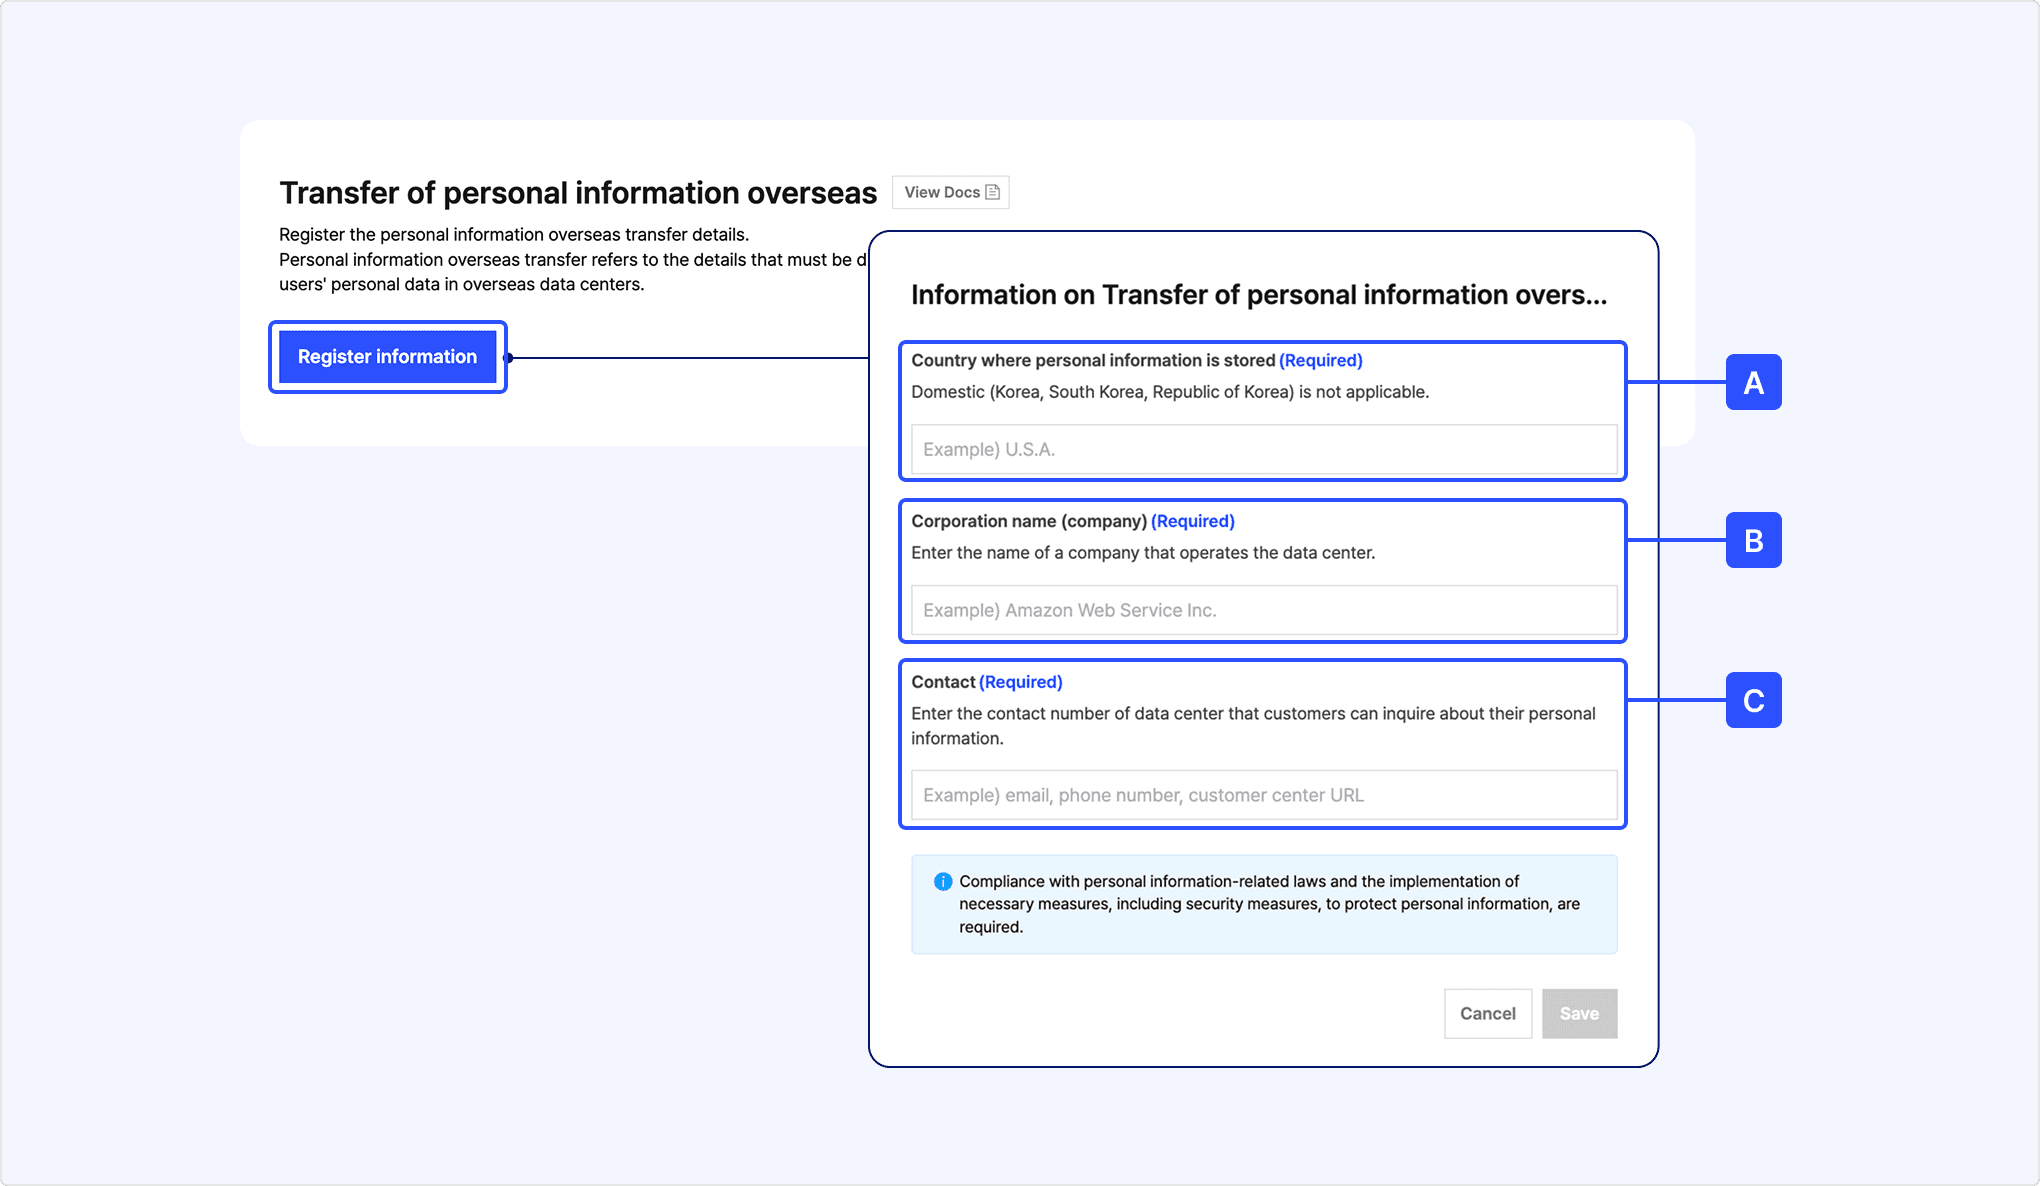
[A] Country where personal information is stored: Enter the country where personal information is transferred to.
[B] Corporation name (company): Enter the name of a corporation to which the personal information is transferred.
[C] Contact: Enter the contact information for [B], such as the email, phone number, or customer service URL of the person in charge of information management, for inquiries related to personal information.
Based on the information entered, the [Consent to transfer personal information overseas] required consent item is added to the Business Authentication consent screen. Users can select [view more] for this consent item to check the details and provide consent.