
This document explains what you have to do before integrating Kakao Login.
To use Kakao Login, you must set Usage settings and Redirect URI. Set OpenID Connect when necessary.
| Tag | Description |
|---|---|
Required | You must apply the settings marked with this tag before integrating Kakao Login into your service. |
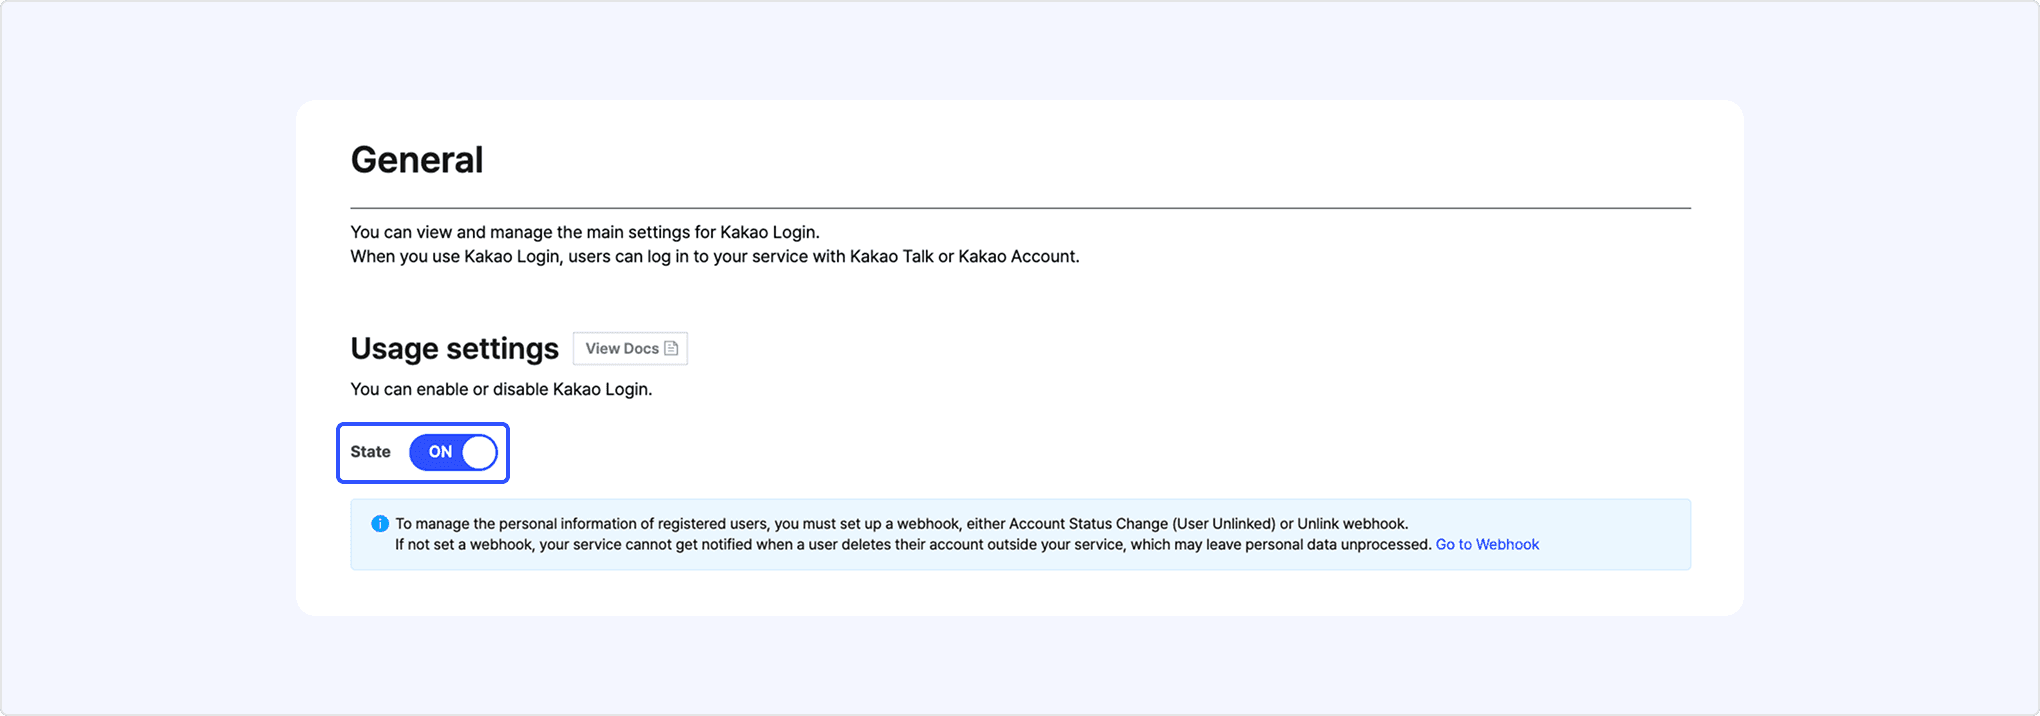
To use Kakao Login, set [State] in [Kakao Login] > [Enable] on the app management page to [ON]. If [Status] is set to [OFF], a KOE004 error occurs when requesting Kakao Login.
To use Kakao Login, a redirect URI must be registered. Kakao Login delivers the authorization code and token requested by the service to the redirect URI. If the redirect URI is incorrect, a KOE006 error occurs during Kakao Login. Refer to the configuration location and method by call type below.
- REST API: In [App] > [Platform key] > [REST API key] on the app management page > [Redirect URI]
- Kakao SDK for JavaScript: In [App] > [Platform key] > [JavaScript key] on the app management page > [Redirect URI]
A Client secret is a security feature that requires including a specific code issued by Kakao Developers in a request to obtain a Kakao Login token.
For service security, the REST API key (including the key automatically created with the app) is added with the Client secret feature enabled, and the related parameter must be included when issuing a token. Refer to the Client secret configuration location and method below.
- In [App] > [Platform key] > [REST API key] on the app management page > [Client secret]
When OpenID Connect is enabled, both an access token and an ID token are issued when logging in with Kakao Login. Follow the steps below to enable OpenID Connect in [Kakao Login] > [OpenID Connect] on the app management page.
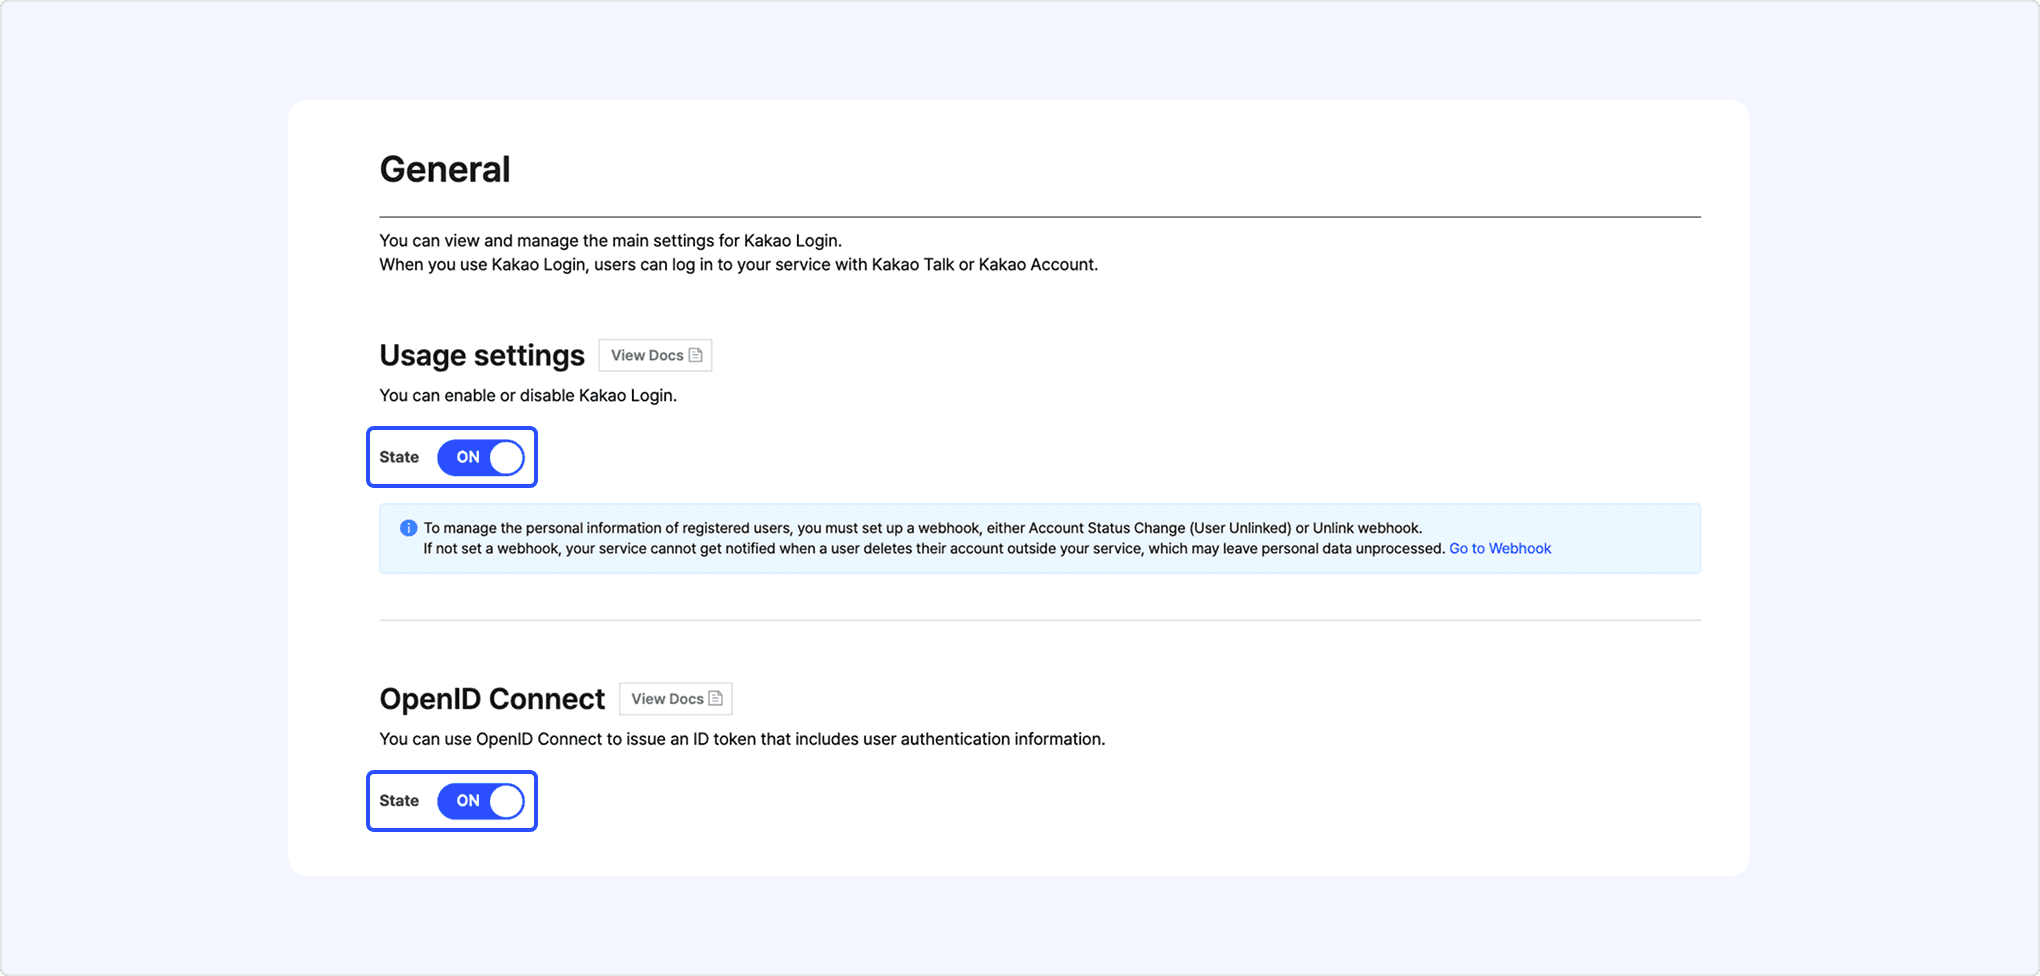
- Set [State] to [ON] in [Usage settings] to activate Kakao Login. You can use OpenID Connect only when Kakao Login is enabled.
- Set [State] to [ON] in [OpenID Connect] to activate OpenID Connect.
- If you change [OpenID Connect] to [OFF], ID tokens will no longer be issued from the time of the change.
- If your service uses ID tokens, login may fail.
A consent item is a setting for obtaining user permission when the service accesses user information or uses specific features. You must configure consent items so they appear on the consent screen in the process of Kakao Login, and users can agree to consent items.
- On the app management page, go to [Kakao Login] > [Consent items] > [Personal information] / [Access permission] and check the items you need.
- In the row for the consent item you want, select [Set] to configure the consent item.
- Important: For some consent items, you must request additional features to get permission, then you can set them.
- To preview the final consent screen displayed to users, select Preview Consent screen.
This is the list of configurable [Personal information] and [Access permission] consent items.
Refer to the full list of consent items below to see which items require user consent in your service.

[A] Personal information consent items
[B] Access permission consent items

[A] Consent types (Required): Select a consent level.
[B] Provision after collecting information through Kakao Account: If the information is not registered in Kakao Account, Kakao requests consent and information from the user, then provide the data to a service.
[C] Consent purpose (Required): Enter the purpose of use.
To preview the consent screen reflecting your app's settings, select [Preview Consent screen] at the bottom of [Kakao Login] > [Consent items] on the app management page.
Some consent items can be configured only when additional feature permissions are enabled. You can request those features by following the steps below. For more on the review process, see Personal information consent item review process.
You can find the permissions required for each item to set consent items in Personal information consent items and Access permission consent items.
- To Request additional features, complete the following first:
- In [App] > [Request additional features], under [Personal information consent items], select [Apply].
- Enter the Personal information consent item application details. Following the Review checklist before you apply can improve the chance of approval.
- Select [Apply] to submit the review request.

The personal information consent item permission request screen is structured as follows.

- [A] Personal information: Select a consent level for the personal information you need; at least one item must be set to either [Required consent] or [Optional consent].
- [B] Kakao Login usage consent: After confirming, select the checkbox; when you select [Next], the information entry form appears.
- [C] Sign-up link: Enter the sign-up page URL where the consent items you collect can be verified; if you use a native app, enter the app store URL.
- If attaching verification materials is difficult (for example, while the site is under development), a product plan or design draft may be submitted instead.
- See also: Review checklist
- [D] Privacy policy: Enter the privacy policy URL that reflects the following:
- Purpose of personal information processing: Clearly state that personal information received from Kakao is processed for sign-up purposes.
- Items collected: List every consent item requested in the review application.
- [E] Sign-up screen: Attach verification materials that prove the items you collect.
- Only one file can be uploaded, in JPG, JPEG, PNG, or PDF format, up to 20 MB.
- [F] Reason for collection: Enter how each piece of user information is used in the service and the purpose of collection.
Before you apply, check the items below to improve your chance of approval on the first try.
- Screen captures and submitted materials must not contain personal information.
- For privacy protection, attached files are deleted immediately and the application is rejected regardless of the content.
- When submitting a sign-up page, submit a screen that shows the name of the service you actually use.
- Items collected on the sign-up page must match the consent items in your review application.
- The types of information the user must enter at sign-up (for example, name, contact, age) must match the types of consent items requested in the review (for example, name, Kakao Account (phone number), birth year).
- Whether each piece of information is required or optional must match the consent level of the applied consent items.
- Example: If you applied for the [Gender] consent item as [Required consent] but the sign-up page collects it as [Optional], the application will be rejected.
- On the sign-up page, it must be clear whether each piece of user information is [Required] or [Optional].
- Attached images (screen captures) should cover the full user journey from sign-up through login to withdrawal.
- The privacy policy must state the purpose of collection, items collected, and collection terms (required/optional).
- The privacy policy must be consistent with the information entered in the additional feature application.
- For services that only offer social login such as Kakao Login, the review is based on the privacy policy.

- Purpose: The review prevents excessive collection of personal information and checks whether the collection purpose is appropriate.
- Review period: About 3 to 5 business days.
- What is reviewed:
- Whether the application information matches the submitted materials.
- Whether the current sign-up flow and scope of personal information use match the application.
- See also: Review checklist
- How results are notified: Email and app notifications to app members, or you can check on the app management page.
- How to view rejection reasons: On [App] > [Request additional features], select [Review rejected] to see rejection reasons and what to do next.
- Re-review: After addressing the rejection reasons, you can re-apply under [App] > [Request additional features] > [Personal information consent items] by selecting [Apply]; this again takes about 3–5 business days.
- Turning off a consent item or changing [Required consent] to [Optional consent] applies immediately without an additional review.
The primary channel is the Kakao Talk Channel displayed on the consent screen during Kakao Login.

- Connect Kakao Talk Channel to your app.
- On the app management page, select [Select primary channel] in [Kakao Login] > [Consent items] > [Primary channel] to choose one of the connected Kakao Talk Channels as the primary channel.

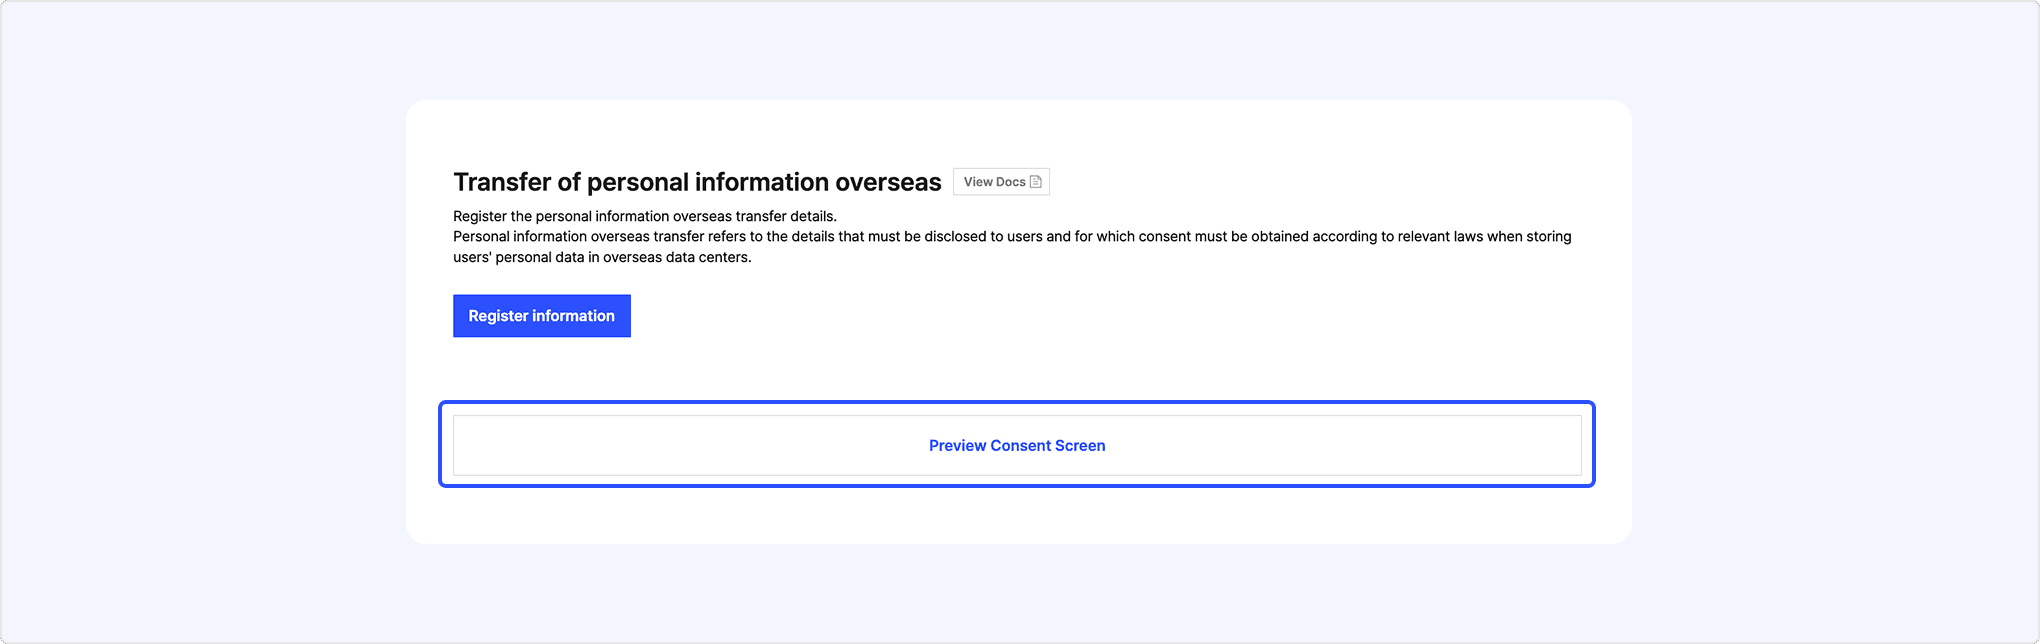
You can register Transfer of personal information overseas information in [Kakao Login] > [Consent Items] > [Transfer of personal information overseas] on the app management page.
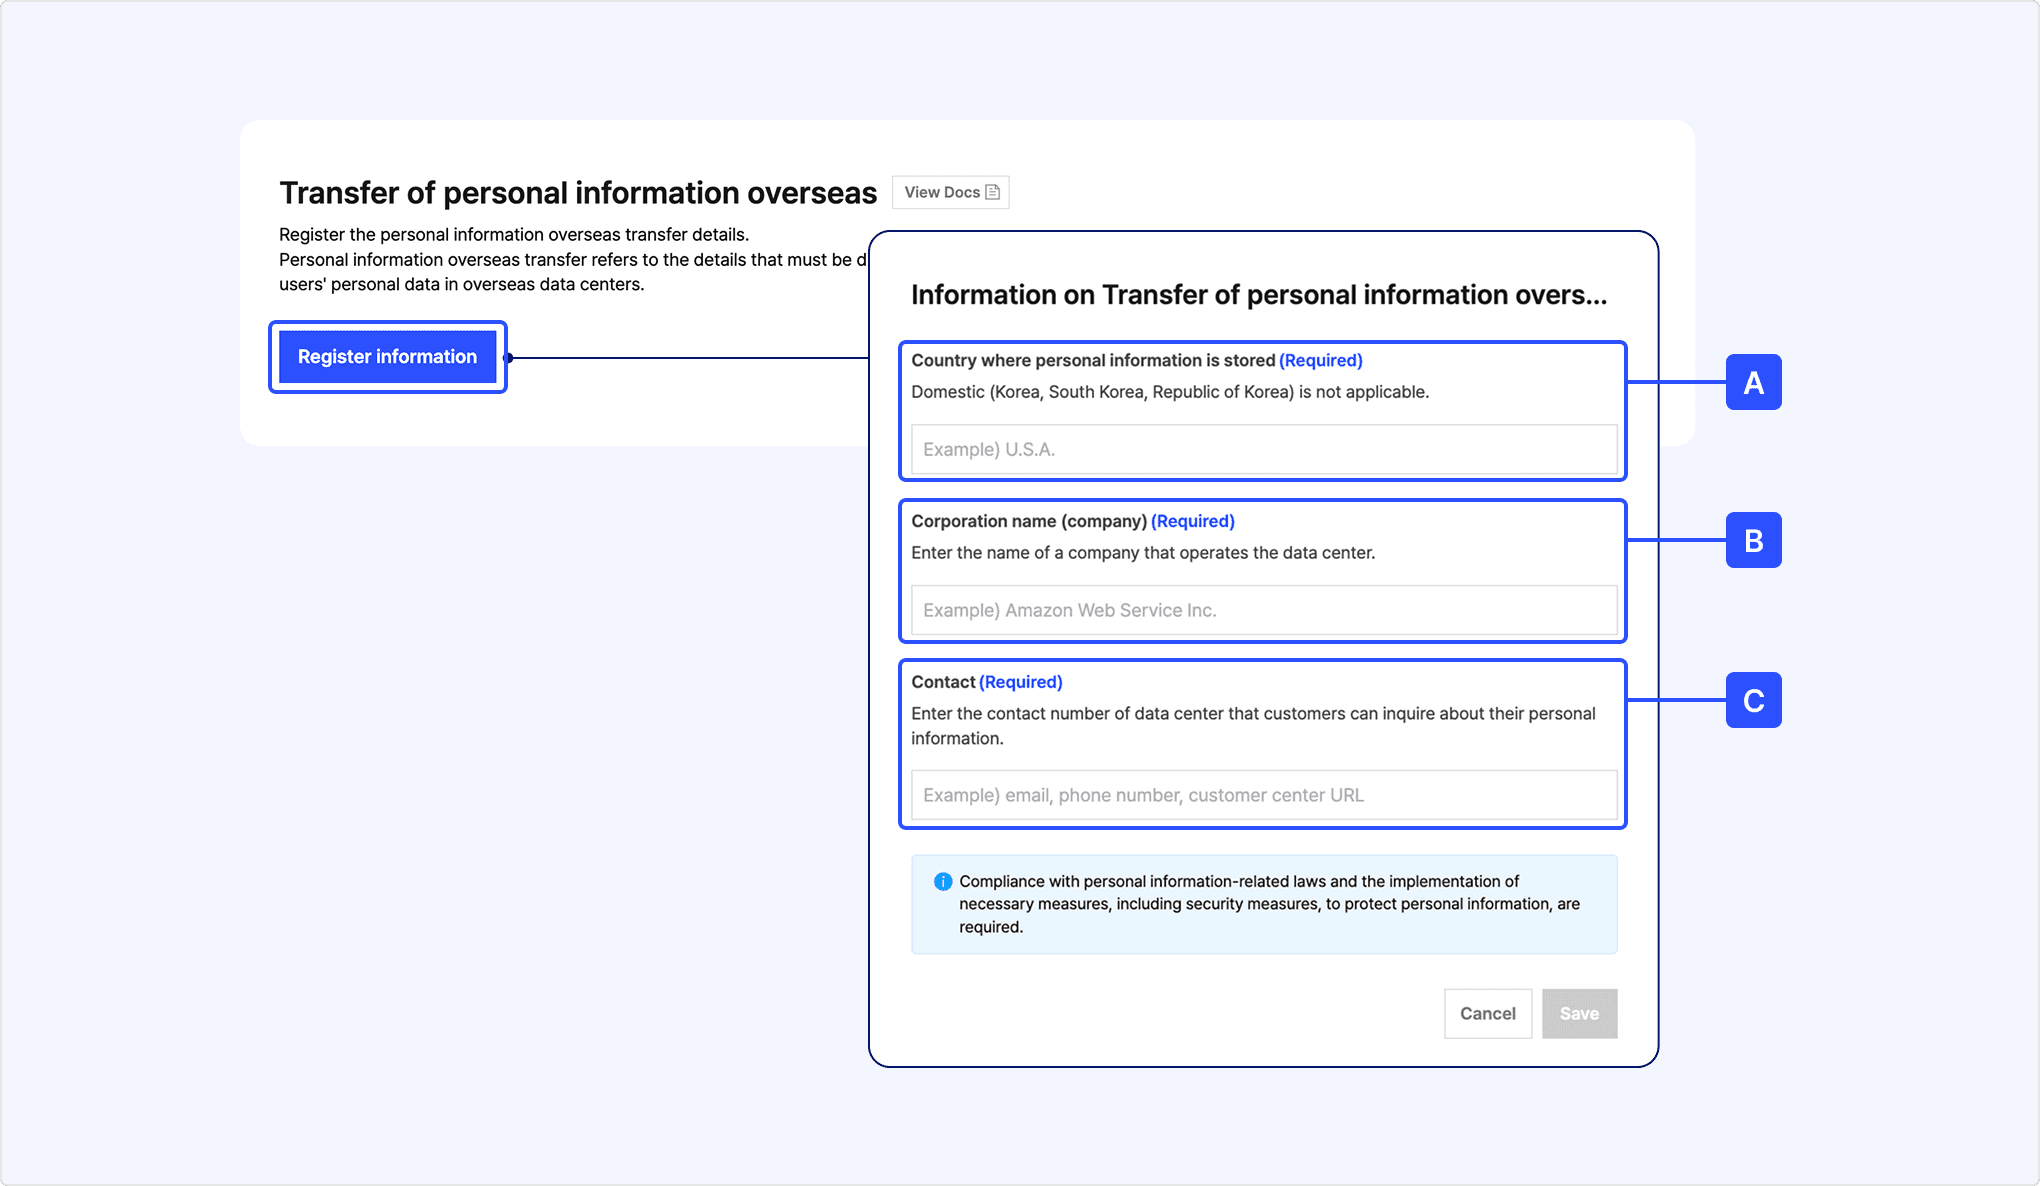
[A] Country where personal information is stored: Enter the name of the country where personal information will be transferred.
[B] Corporation name: Enter the name of the corporation that will receive the personal information.
[C] Contact: Enter the contact information of [B] for personal information inquiries, such as the email address, phone number, or customer service URL of the person responsible for information management.
Based on the information entered, the [Consent to transfer personal information overseas] required consent item is added to the Kakao Login consent screen. Users can select [view more] for this item to check the details and agree.
This feature is available only for services that have adopted Kakao Sync.
The Simple Signup feature, you can display service terms configured in your app on the Kakao Login consent screen to easily obtain user consent for the terms.
To use Simple Signup, follow as below.
- Check eligibility for additional features
- Request business information review.
- Connect Kakao Talk Channel to app.
- Register a service term and enable it in [Kakao Login] > [Simple Signup] on the app management page.
- Set [Usage settings] to [ON]. At least one terms must be enabled to enable the Simple Signup.

You can register a new service terms by selecting [Add a service term] in [Kakao Login] > [Simple Signup] on the app management page. You must comply with Service terms management.
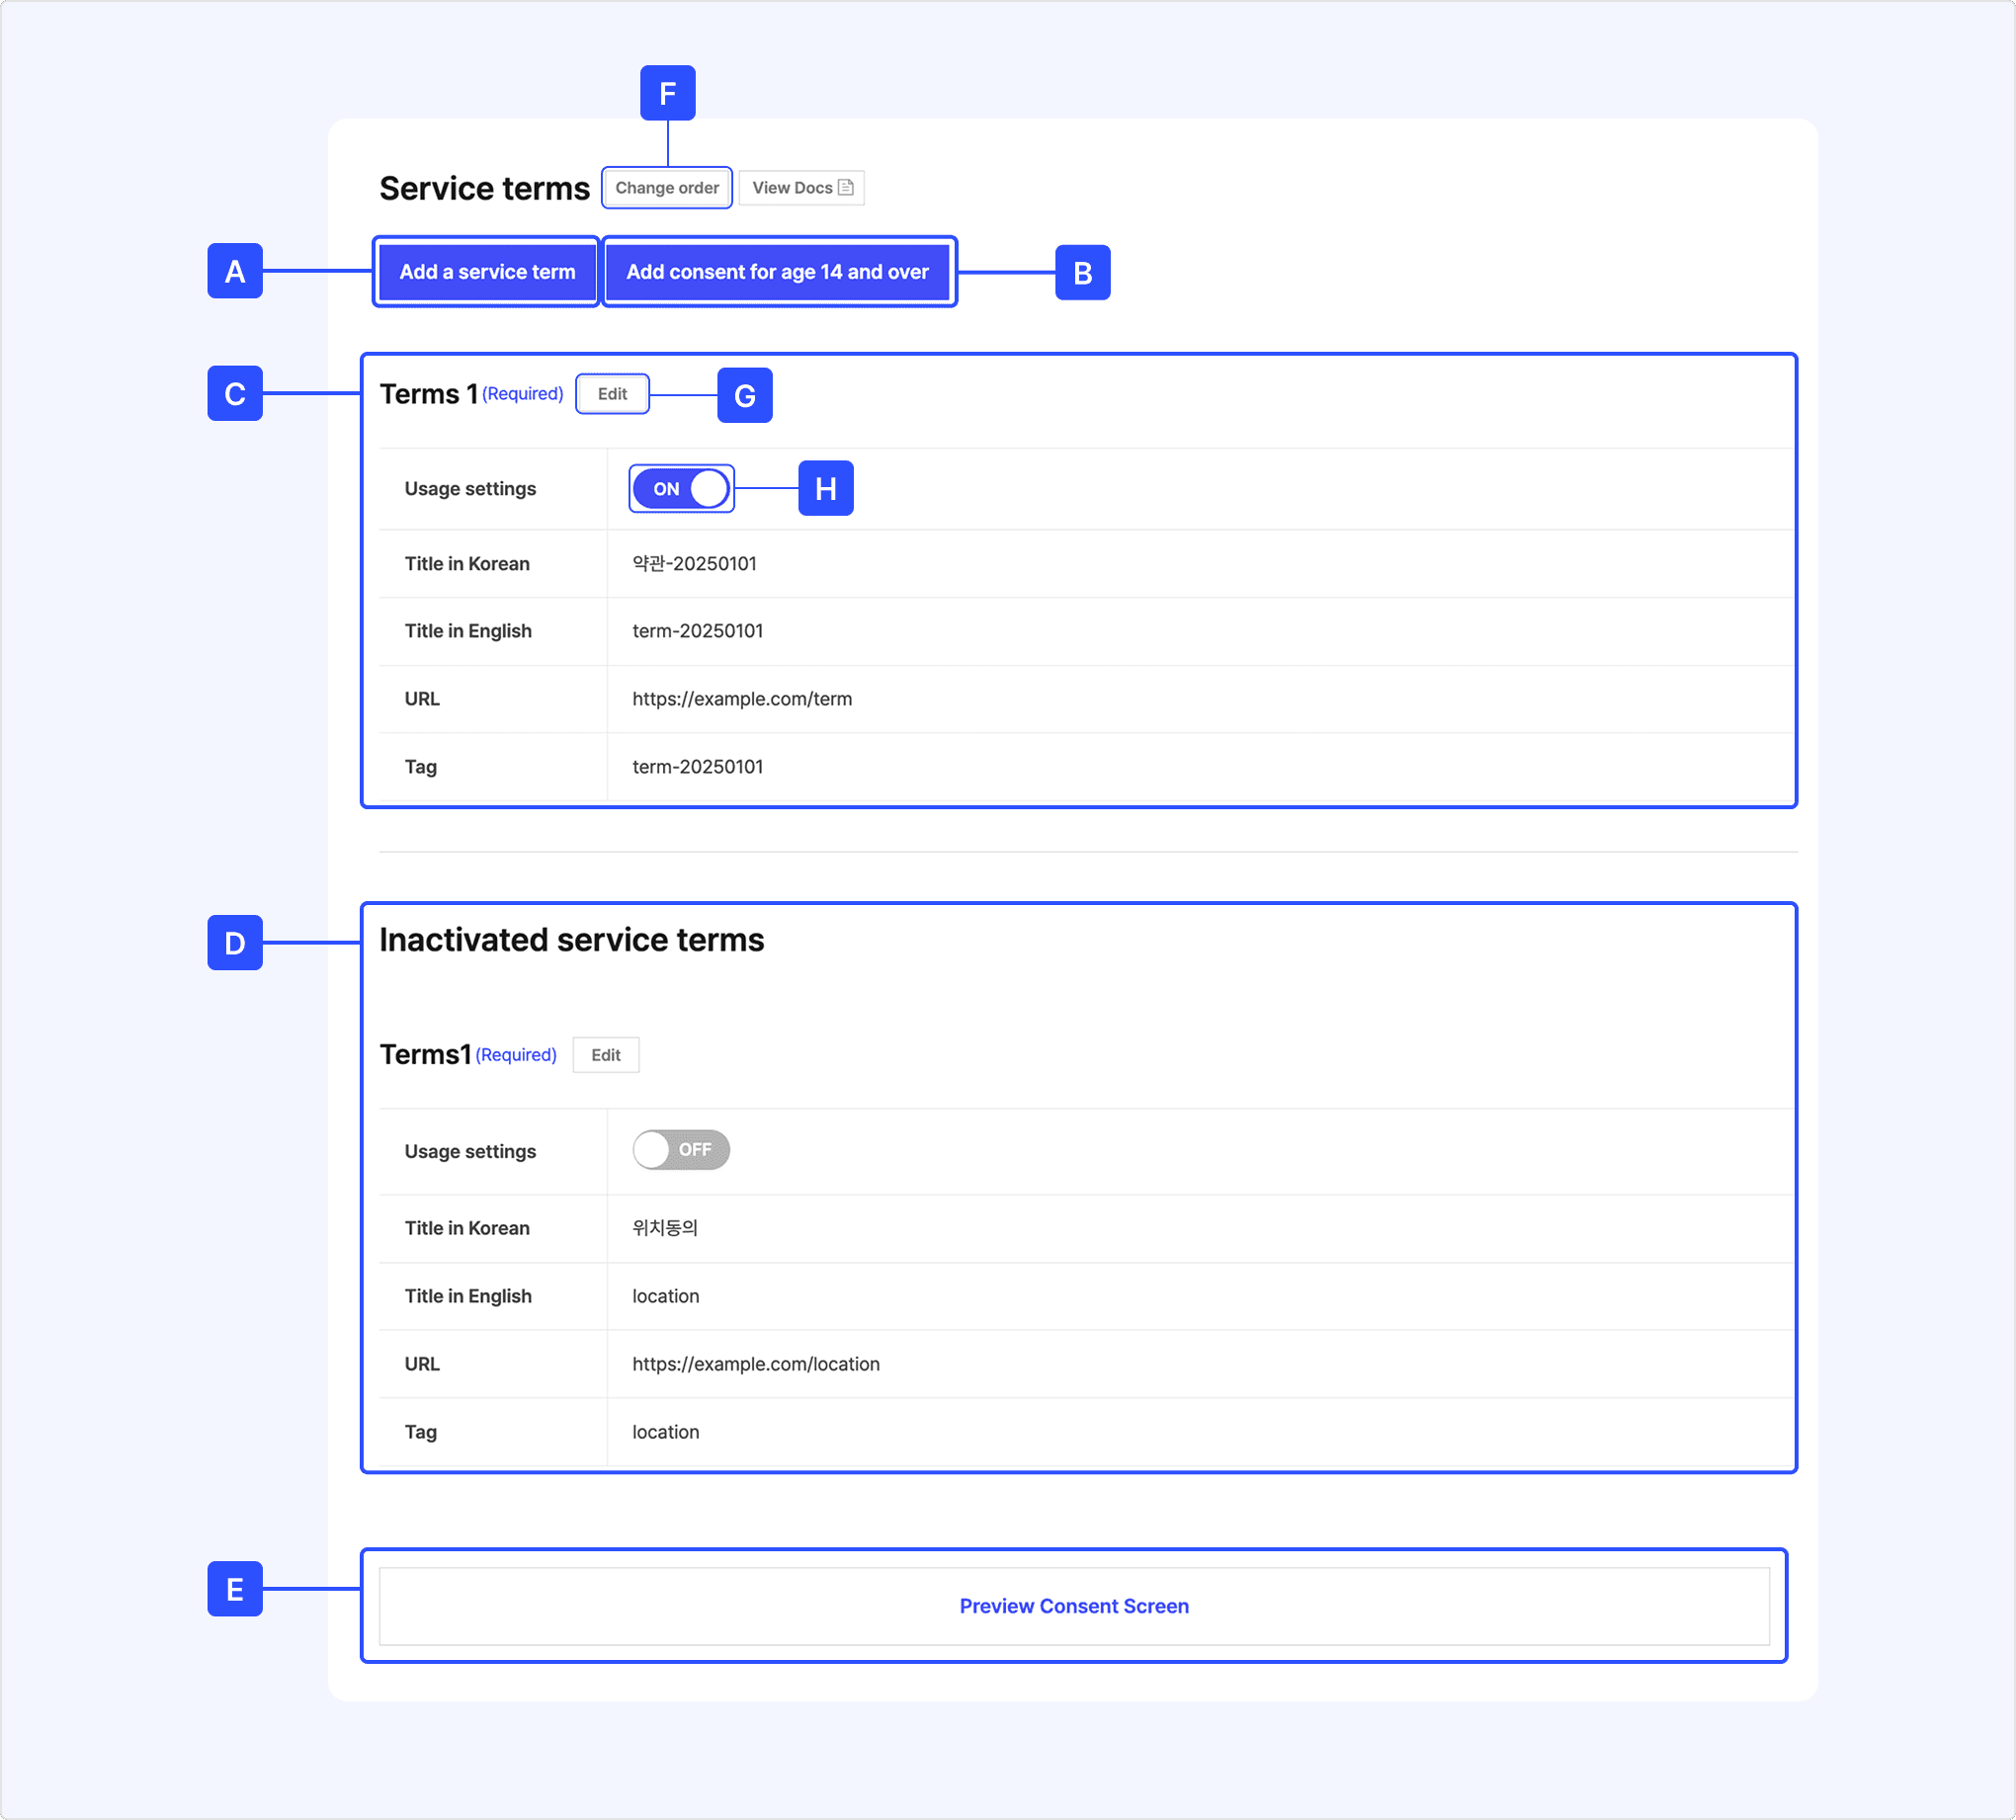
[A] Add a service term: Registers information of a service term.
[B] Add age consent for age 14 and over
[C] List of enabled terms: Displays the terms that are set to use (ON) among registered terms.
[D] Inactivated service terms: Displays the terms that are not used (OFF) among registered terms.
[E] Preview Consent Screen: Displays preview of Kakao Login consent screen reflecting the set terms.
[F] Change order: Changes the display order of service terms on the Kakao Login consent screen.
[G] Edit: Changes the settings for each term.
[H] Usage setting: Select whether to display on Kakao Login consent screen.
When adding service terms, you must set the following information.
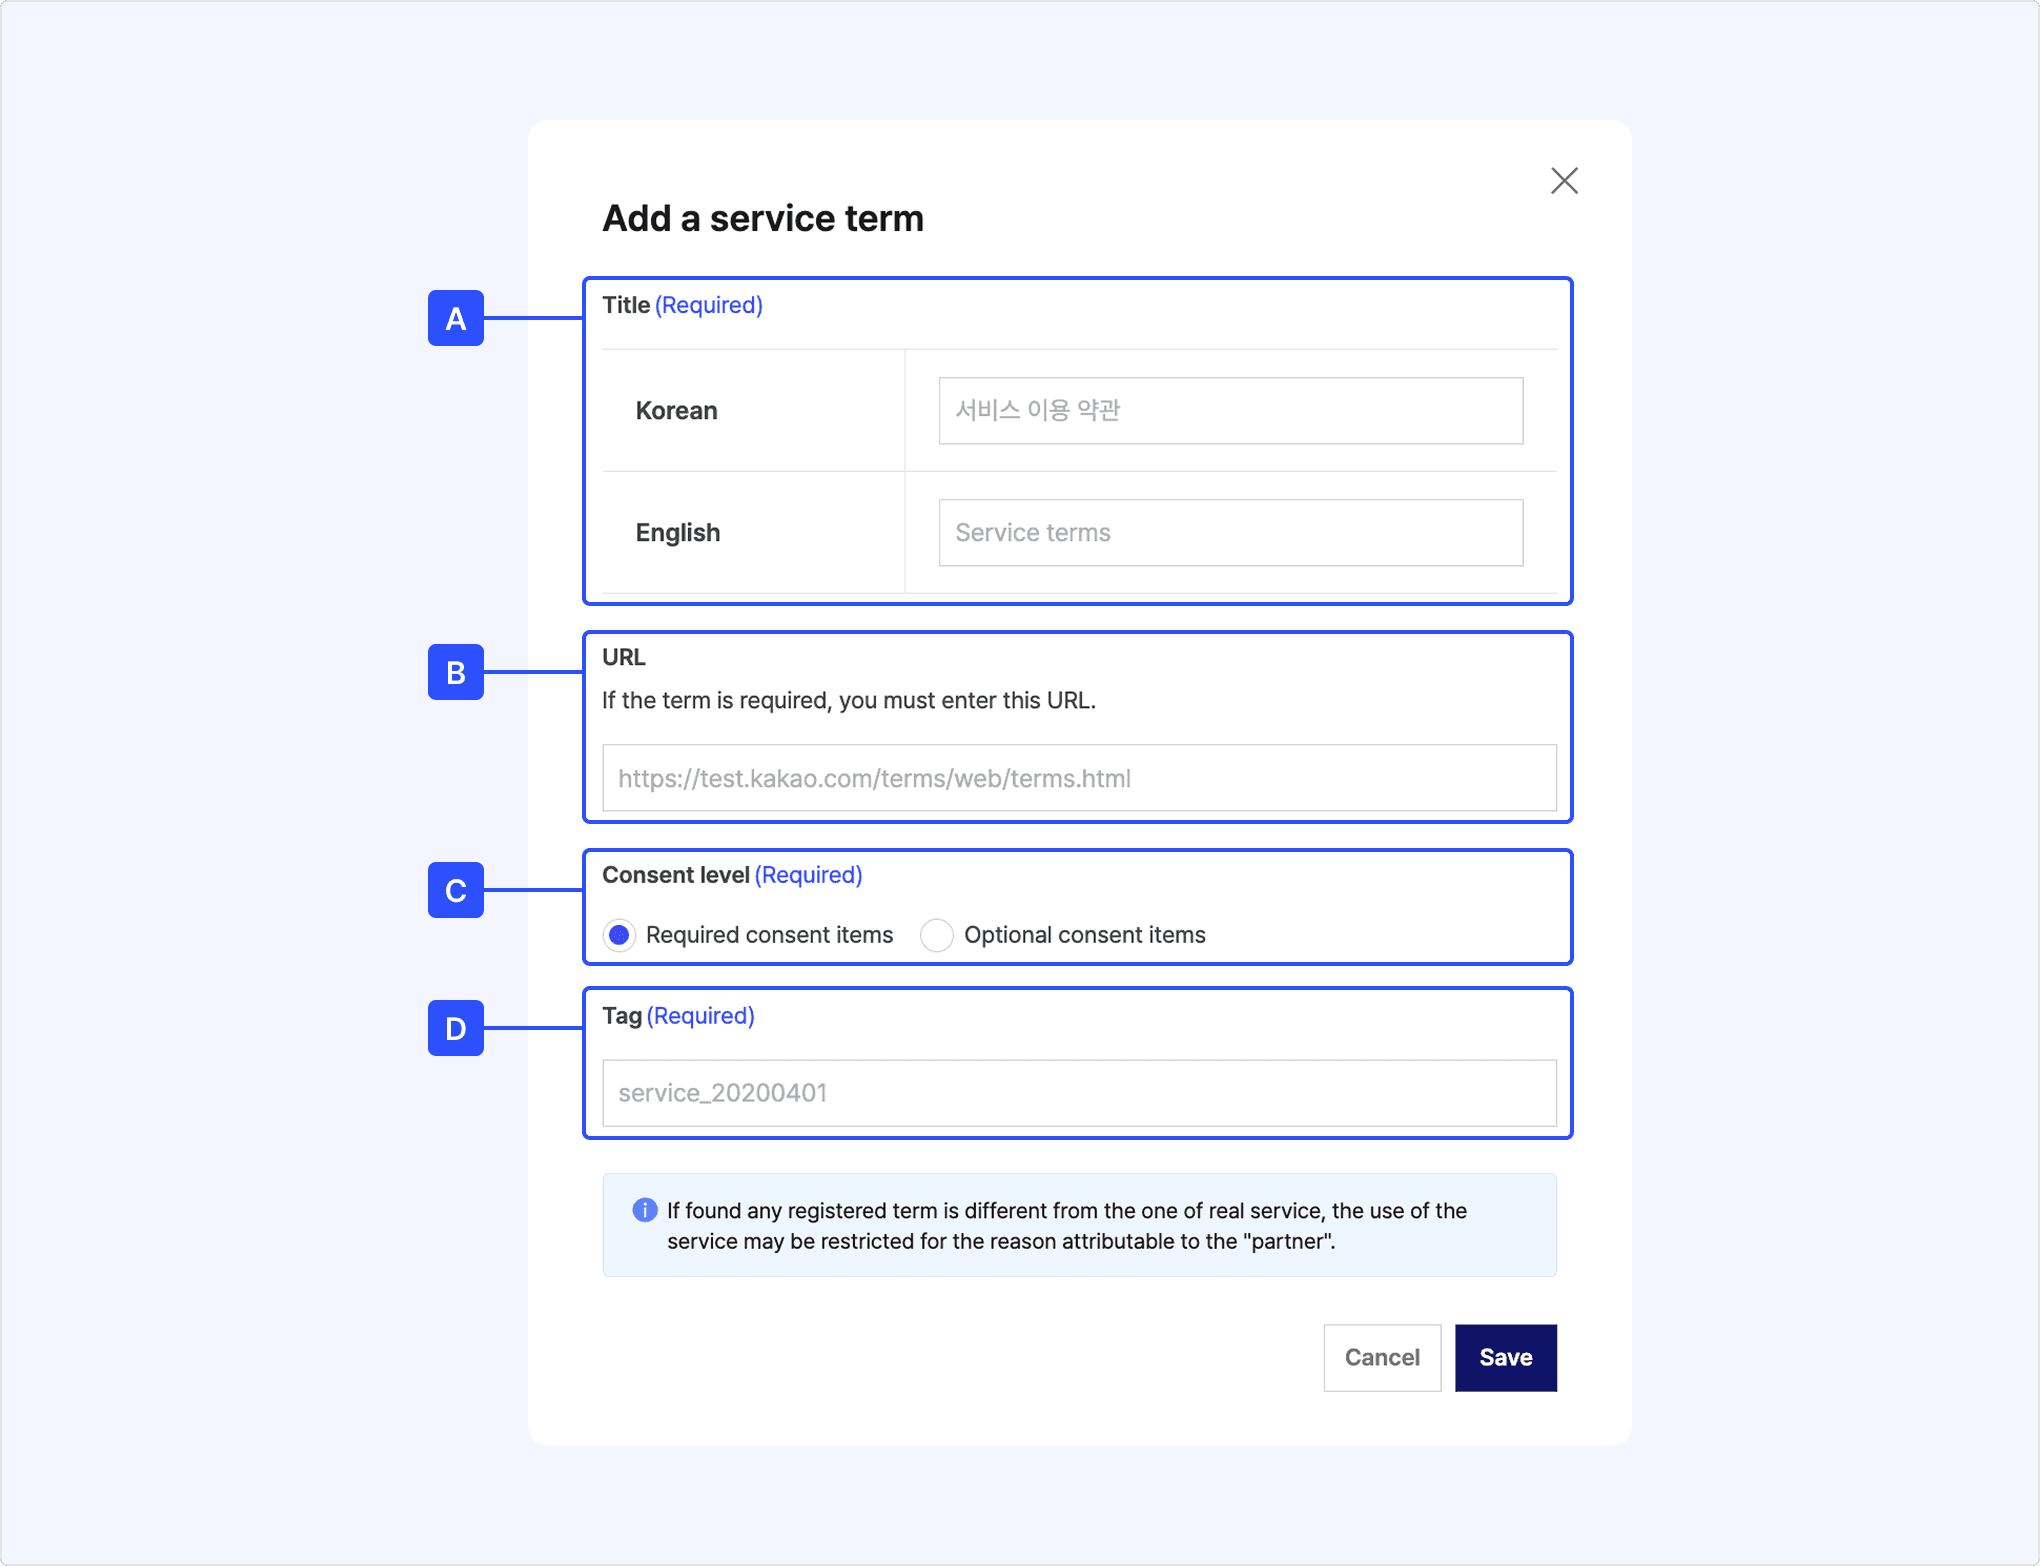
[A] Title: Enter both Korean and English titles. The English service terms title is used when the user's device language is set to English.
- Korean service terms titles support only Korean, English, numbers, spaces, and special characters that can be entered directly from the keyboard (up to 45 characters).
- English service terms titles support only English, numbers, spaces, and special characters that can be entered directly from the keyboard (up to 100 characters). Even if there are no English service terms, enter the English service terms title in English.
[B] URL: Enter the web page URL where the terms content can be checked. For optional service terms only, the URL can be omitted.
[C] Consent level: Select the consent level to request consent from users (required or optional consent item).
- Service terms that must be agreed to at the time of sign-up must be set as [Required consent] consent items.
- Terms that users can additionally agree to depending on the scope of service provision should be set as [Optional consent] consent items.
[D] Tag: Enter a unique value to distinguish each service terms.
- Only English, numbers, hyphens (-), and underscores (_) can be entered.
- The following formats are recommended:
${KEYWORD}_${DATE},${KEYWORD}_${ORDER}(Example:terms_20220701,terms_01). - Enter a value that can be used in actual service development. The tag is required when making the Kakao API requests below.
- Retrieve consent details for service terms: Check details of the service terms agreed by the user.
- Get consent to desired service terms: Request a specific service terms consent from the user.
- Revoke consent for service terms: Request revocation of the user's consent for the service terms.
You can use the Logout of service and Kakao Account feature by registering the logout redirect URI in [Kakao Login] > [Advanced] > [Logout redirect URI] on the app management page.

The logout redirect URI supports HTTP/HTTPS protocols and ports 80 and 443, and distinguishes between HTTP and HTTPS protocols, so each must be registered separately. Up to 10 logout redirect URIs can be registered. If you need to register more than 10, contact DevTalk.
You can register user property keys and check the stored values for members linked to the app in [Kakao Login] > [Advanced] > [User property] on the app management page. Up to 5 user property keys (excluding user property reserved keys) can be registered per service.
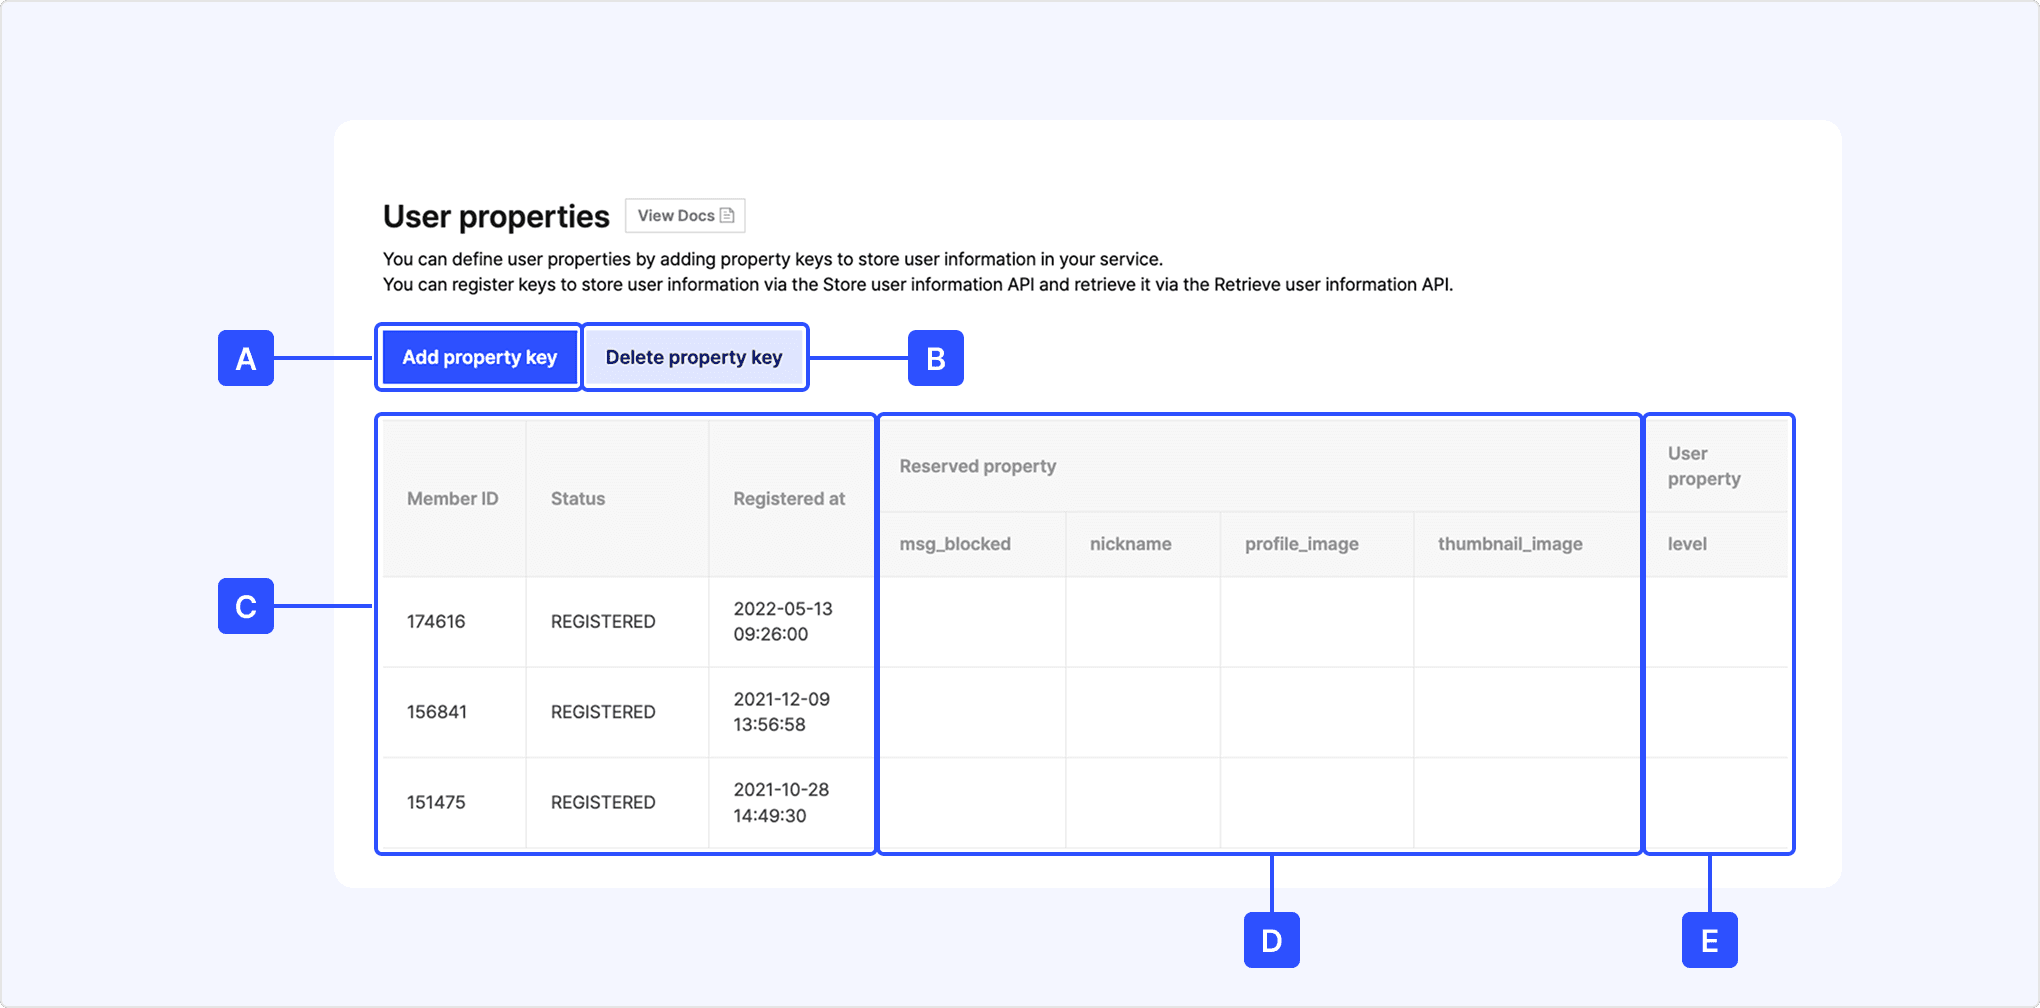
[A] Add property key
[B] Delete property key
[C] Account information: Account information of members linked to the app.
[D] Reserved property: User property reserved keys and stored values.
[E] User property: Added user property keys and stored values.
nickname, profile_image, and thumbnail_image are reserved keys used by the Kakao platform and cannot be used for user property key registration.
From May 12, 2022, the values of the default properties nickname, profile_image, and thumbnail_image for profile storage are changed to real-time Kakao Account profile values, and updating values using Store user property is no longer supported. For details, see the notice.